Showing posts with label Guest Posts. Show all posts

Thursday, April 5, 2012

Outdoor Adventures: Geocaching for Easter Eggs by Erin Uda

This weekend, try a slight variation on the standard Easter egg hunt by adding GPS coordinates.

Geocaching is an outdoor activity where you use GPS coordinates to find hidden treasure.  You can use a website or an app on your smartphone to find lists of geocache locations.  Once you have found the hidden treasure box, using a GPS unit or the app on your phone, you can sign your name and take a treat from the box.  Remember if you want to take something from the cache, be sure to bring something to leave behind.


If you don’t want to find other people’s hidden boxes, you can create your own Easter egg hunt by using GPS to track the location of each egg or treasure you hide. 

Happy Hunting!!


About the Apps:

The best way to go geocaching is with a GPS system or your smartphone, via a GPS app.
Geocaching.com offers an introductory app that allows you to find 3 caches close to your home.  But if you want the full version of the app, you’ll need to fork out about $10; well worth it if you and your kids love this activity.  And it’s cheaper than a movie.

There is a free app from Garmin that includes a map with geocache pins in your proximity, plus a compass.  We tried it out on our own geocache adventure this weekend and my boys loved it.  It isn’t as comprehensive as geocaching.com, but since we’re beginners, this worked well for us.  

Monday, March 19, 2012

Outdoor Adventures: The Sun by Erin Uda


This week is the spring equinox, where the day and night are almost the same length.  From now on, the days will grow longer than the nights and will keep getting longer until the end of June, when they start slowly getting shorter again. 

Since winter is officially gone, let’s get out and enjoy the bright warm sunshine!

If you’re science-minded and want to talk with your child about the earth’s rotation around the sun and why we have seasons and our days get longer and shorter, use the links and charts below.  I suggest sitting near a bright window in the sun, if you have one, so your child can see and feel the difference between shade and sun.  When you talk about summer, stay in the sun, and when you talk about winter move to a shady part inside and have your child describe the difference he feels in both temperature and light.

Links and charts of the earth’s rotation around the sun: 

Once you’re ready for some outdoor fun, get the following items and head to a sunny spot outside to make a sun dial.

Even better, make your child the sun dial by going outside every hour to draw a circle around her shadow’s head while she stands in the same spot (I recommend drawing a small square where she should stand).  Write the hour inside each circle as you draw them.  


Explain to your child that when the sun shines down on us, a shadow is created where we stop the sun’s rays from reaching the ground.  Shadows are used to tell time, but they’re also useful in the summer when it’s hot, and they’re very fun to step on.  Try making your shadows do crazy things, like shake hands with each other, or not touch your feet.  Outline your shadow with sidewalk chalk and make fun shapes or letters.  Go out at different times of the day and measure the length of your shadow.  When is it the longest?  When is it the shortest? 

Use your shadow (and a flashlight) to make a profile portrait of your child.  If interested, use THIS LINK from Christina Williams that I found on Pinterest to help you make a cool piece of art from your outline.

(Image found HERE)

Try making art using the sun.  Find some solar photo paper (it changes color when exposed to the sun, found HERE) and create a collage out of natural items on it.  Or just place the items on a sheet of colored construction paper and leave it out for at least a couple of hours.  The color will fade on the areas of the paper that were exposed to the sun, while the areas covered with your objects will still be brightly colored.

Talk about the different light that comes from the sun, not just the light and colors that we can see, but also UV rays, which is light we can’t see.  These rays are what make the paper turn color or make certain colors appear to glow.  UV light can be seen by certain animals, and can be seen as a bright glow if you use a black light.  Try some fun projects by going to these LINKS:
And remember, UV rays are also harmful to our skin, which is why we wear sunscreen when we go outside.

When you’re ready to wind down, talk with your child about Stonehenge and the many ancient sites built specifically for keeping track of the sun’s progress through the sky.  Talk about how much work and study (and yes, math) went into making these sites and ask your child what they think.  Go on a photo tour of these places or go to the library and get some books about them.  The study of these places is called Archaeoastronomy.


Click links to learn more about each picture:


Because the spring equinox was an important time in the lives of ancient cultures, it was celebrated with many different holidays and festivals, from religious to planting themes.  Look around and see if there are any in your area.

Recommended Books:

  • Done in the Sun, Anne Hillerman (621.471 H557)
  • Maui and the Sun, Gavin Bishop (398.297 M443)
  • How the Rooster Got His Crown, Amy Lowry Poole (398.267 H8301)
  • Ten Suns: A Chinese Legend, Eric A. Kimmel (398.267 T25)
  • The Wind and the Sun: an Aesop Fable, Bernadette Watts (398.2515 W722)
  • Guess Whose Shadow? Stephen R. Swinburne (770 Sw63)
  • What Makes a Shadow? Clyde Robert Bulla (535.4 B872)
  • The Reason for Seasons, Gail Gibbons (525.5 G352)
  • The Day-Glo Brothers, Chris Barton (535.352 B2854)
  • Light and Shadows, Brian Knapp (535 K7272)

Sunday, February 12, 2012

Outdoor Adventures: Snow Play by Erin Uda

Let’s go outside and freeze things!  

(Image found HERE)
 Start with bubbles – did you know they freeze if you blow bubbles in weather colder than 32*F?  Blow a bubble, catch it on your wand, and watch it turn into a small crystal ball.  You can also just watch the liquid crystallize on the wand.

Make popsicles by putting them outside instead of in the freezer.  Make your favorite flavor and once you have it in the popsicle mold, cover it with plastic wrap if needed and set it in a safe, cold spot.  Wait a few hours and enjoy!

(Image and more ideas can be found at Play at Home Mom)
Experiment with ice.  Fill a small bucket and a cookie sheet with water and place them in a safe area outside to freeze.  Keep an eye on them to see which container of water freezes faster.
Once they’re fully frozen, sprinkle salt on half of each container.  What does the salt do?  How far down does it affect the ice?  Does it make a difference if you add more or less salt?  If you try kosher, rock or table salt?  Try a variation by filling two small buckets, one with saltwater, one with pure water.  Watch and see how long each takes to freeze.

(Image and idea found HERE)
Create ‘ice gems’ by filling small water balloons with water and food coloring, or placing drops of water on a lined cookie sheet, then freezing them.  See THIS LINK for details on how to make them.  When you’re finished, use your gems to decorate your front porch, garden, or yard.  Try making the ice buttons into rainbows by layering different colors of water as they freeze. We put ours in our empty planter pot and they look beautiful


(Image found HERE)
If you want more color outside, fill some spray bottles (you can get these from the dollar store) with water and food coloring.  Take them outside and create colorful designs in the snow.  Make snow angels and give them faces and clothing.  Or color your snowman.

If it’s snowing, bring a piece of black construction paper outside with you.  Catch snowflakes on it and observe the different shapes of each one.
(Image and idea found HERE)
And if you just want to enjoy the wonders of ice indoor, try this SENSORY TUB from COUNTING COCONUTS. It would be especially fun for your littlest ones!


Recommended Reading:

  • The Snowy Day, Ezra Jack Keats (Caldecott Medal winner)
  • The Story of Snow: The Science of Winter’s Wonder, Mark Cassino
  • The Snow Child, Harriet Ziefert
  • Charlie and Lola: Snow is my favorite and my best, Lauren Child
  • Let It Snow, Maryann Cocca-Leffler
  • The Jacket I Wear in the Snow, Shirley Neitzel

Tuesday, January 10, 2012

Outdoor Adventures: Astronomy by Erin Uda

(Image Source)

The longest night of the year was only a couple of weeks ago.  So instead of turning into bears and hibernating, you can bundle up, make some hot chocolate, and get outside to check out the stars.

Your backyard will work just fine for this activity, but if you can, take a trip to a place far from the city lights so you get the best view possible of the stars.  There is a lot of light pollution in any city, which makes it difficult to see any but the brightest stars.  If you can’t go far, try a nearby park; they’re usually a bit darker than the average street.  

(Image Source)
 It will take a few minutes for your eyes to adjust to the night sky.  If you choose to have a book or printout (HERE is one for the sky in UT) in front of you, use a red light or cover your flashlight with red paper or plastic to keep your eyes adjusted to the dark.

Once you’ve acclimated to both the dark and the cold (while drinking that hot chocolate) spend time locating the major constellations in your sky. 

There are plenty of easy-to-find constellations that are visible in the winter:
There are also a few great sites for checking to see if there are any cool celestial happenings coming up:
    1. NASA's "Astronomy Picture of the Day"
    2. Earth Sky's "Tonight sky"
    3. Sky and Telescope's "This Week's Sky at a Glance"
      If you are looking for a project to do, click HERE to see a a fun craft I found via Pinterest to make during the day. You can use it to prepare your kids for their upcoming evening adventure.

      (Image Source and Idea can be found at Play at Home Mom)
      If it is simply too cold outside, or your children are too young to spot constellations in the sky, try THIS idea from PLAY AT HOME MOM! You can poke constellation patterns through one side of a giant cardboard box and then stick your Christmas tree lights through the holes to create a beautiful star cave for your little ones to play in. Don't forget to crawl in yourself and take a peek!

      Recommended Reading:

      • Turn Left at Orion, Guy Consolmagno & Dan M. Davis
      • Sky Dragons and Flaming Swords: The story of eclipses, comets, and other strange happenings in the skies, Marietta D. Moskin
      • The Man in the Moon: Sky tales from many lands, Alta Jablow

      For more stargazing books, check out Call # 523

      Tuesday, January 3, 2012

      Outdoor Adventures: Wood Carving by Erin Uda


      Wood carving, or whittling, is a long-standing tradition for campers and outdoorsmen.  It’s also a good exercise in fine motor skills and patience.  There are many mediums that can be carved – wood or branches, soap, soft clay or plaster of paris, and vegetables (typically gourds such as pumpkins).  And it’s a great project for a long weekend out of school, since it can take plenty of time to finish your project.

      There is no specific tool you must use when carving. Some of the best tools for young beginners are play-doh shaping tools, especially if you’re carving soft clay or soap.  If your child is old enough, try letting him use a butter knife, cuticle pusher, or the blunt tools from this year’s pumpkin carving kit.  And if you get really into carving, you can purchase a set of pottery sculpting tools (found in most art or craft stores).  If your child is eight or older, or you feel comfortable with the idea, try letting him use a Swiss Army knife on a scrap of wood.  A finger guard can prevent accidental injuries.
       
      I would suggest starting with the following items:

      1. Paper and pencil, to create a blueprint and outline
      2. A bar of soap, any color
      3. Plastic silverware or play-doh utensils
      4. A cookie sheet lined with aluminum foil or wax paper, to catch the shavings


      If you carved pumpkins for Halloween, then you know the basic techniques you’ll need.  For any beginners, here are a few tips:

      Start with a drawing or pattern of what you hope to create.

      Use a pencil to trace a faint outline on your medium.

      Shave away chunks of material until you have the general shape.

      Slowly and carefully carve the fine details of your design


      If you need some designs or inspiration, try carving your child’s name in block lettering.  Or carve a simple, stylized animal. 

      Once your children get the hang of it, try making Christmas ornaments using small pieces of wood or branches.  You can create simple shapes like circles and triangles, or get fancy and make snowflakes, icicles, and other objects.

      If it’s not too cold, the porch or a picnic table can be perfect work spaces.  Be sure to wear good gloves, to keep your fingers warm.  And have fun!! 

      If you like, share your creations with the rest of us by posting your pics. 

      Happy carving!

      Recommended Reading:

      • Soap Carving: For Children of All Ages, Howard K. Suzuki
      • Carving for Kids: An Introduction to Woodcarving, Robin Edward Trudel
      • A Beginners Guide to Whittling, Bruce Totman
      You can find more books on wood carving at your local library.  Check out call number 745.592.

      P.S. You can check the calendar tab at the top of the page to see other activities we will be doing throughout the week!

      Monday, November 14, 2011

      Outdoor Adventures: Pilgrims and Indians by Erin Uda

      This week we’re going back in time to experience life as a Pilgrim or an Indian. Create a teepee in your yard using an online pattern, or a sheet and some sticks/PVC pipes. Let the kids help you tie, sew, and decorate. If you’re not crafty, feel free to use a tent and some imagination.

      (Click HERE for image source and the pattern to make this Teepee)
      If the teepee is a bit too involved for you, try making a fort using blankets, chairs, and books or tarps and rope. You can pretend to be the Pilgrims instead of the Indians.

      Or do both – first be Indians, then be Pilgrims.

      Spend a few hours living outside and learning what they went through that first winter. You could make it an immersive experience, actually having them carry buckets of water around and trying to re-create their simple, impoverished lives; or you could keep it fun and light by simply reading books and telling stories together in the teepee or fort once it’s finished, and then leaving it up for them to play in for a few days.


      When it gets closer to Thanksgiving, plan a children’s feast. Bring the meal outside and talk about the first thanksgiving, the pilgrims, the Indians, and how they worked together and helped each other.

      And remember to dress the part! Make a feather headdress and a paper grocery sack vest or a Pilgrim hat/bonnet and buckles for your shoes.

      Recommended Reading:
      • Thanksgiving on Plymouth Plantation, Diane Stanley
      • Alligator arrived with apples: a potluck alphabet feast, Crescent Dragonwagon
      • Friendship’s First Thanksgiving, William Accorsi
      • I know an old lady who swallowed a pie, Alison Jackson
      • Thanksgiving Day, Anne F. Rockwell

      Friday, November 11, 2011

      Outdoor Adventures: Winter Fashion Show by Erin Uda

      This week I've been getting a little behind on computer stuff now that I am trying to avoid it during my "work hours". So today I had to convinced my hubby that I could practice self control if he left the computer unlocked, and that I would only use it during nap time! Well, it is now nap time and I have another fantastic post for you from my sister Erin. Enjoy!

      Naomi

      Winter Fashion Show

      It’s finally starting to get cold outside, and for those of us who can’t wait to start wearing our favorite winter gear, this activity is for you.


      This week, host an outdoor winter fashion show using what’s in your closets. Pull out a few pieces of your child’s favorite winter clothing – snow suits, striped tights, boots – and walk the runway outside.

      Set up an area in your yard or at the park for the kids to walk up and down and show off their new (and old) winter clothes. Pull out a few props, like a snowboard or sled, or invite your neighbors and friends to make it even more fun. An elevated catwalk (try using the park tables) lets everyone have a good view of the action.


      See how many unique winter outfits you can create with what you already have. If you need some fashion inspiration, spend a few minutes with your kids looking at their favorite stores’ websites. How are the pint-sized fashion plates dressed? Or ask yourselves: Where do we like to go and what do we like to do in the winter? Then create activity-appropriate outfits. If you need a little bit of creative direction, try picking outfits for the following categories: winter sports, school day, play time, party wear, pajamas, or holiday.

      Consider using an older sibling or parent as the announcer, and another as a photographer. Prepare an introduction for each child and be ready with some witty comments about each outfit while the kids are showing off. And remember the music!


      Take a picture of each child’s outfits. Hang them on the inside of their closet door or put them in a book so your child can find her favorite outfit quickly when it’s time to get ready. You could also include a few pictures of hairstyles to choose from, making mornings a little bit easier.

      If you’d rather show each piece individually, you could lay the clothes out on the floor to make a collage, or use a site like THIS ONE to make a personalized outfit collage using items found on your favorite store’s website.


      Recommended Reading:
      • The Emperor’s New Clothes, Hans Christian Anderson
      • Ella Sarah Gets Dressed, Margaret Chodos-Irvine
      • Fancy Nancy, Jane O’Connor
      • All Dressed Up and Nowhere to Go, Daniel M. Joseph
      • Animals Should Definitely Not Wear Clothing, Judi Barrett
      • The Kettles Get New Clothes, Dayle Ann Dodds

      Monday, October 31, 2011

      Outdoor Adventures: Family History - Graveyard Visit by Erin Uda

      (Click HERE for image source)

      This week we’re visiting a GRAVEYARD. A bit creepy, I know, but I thought it would be appropriate for the Halloween season.

      (Click HERE for image source)


      Most graveyards are peaceful, and have beautiful, artistic elements incorporated into the headstones or markers. And some, especially those that are older, feel more like cities than fields. The sepulchers look like houses, and entire families are buried there. Others, like the military graveyard in Arlington, have rows and rows of crosses or stars representing the vast number of soldiers who gave their lives for our freedom.

      (Click HERE for image source)
      Be sure to do some research before you go, so you choose an appropriate site. You can visit THIS slightly morbid, but incredibly interesting site to find graveyards nearby with famous (or slightly famous) residents. For instance, I learned that the man who invented disposable diapers is buried in the Provo, UT Cemetery!


      If you have relatives buried nearby, make a special effort to visit their graves. Spend some time talking to your child about family and ancestors. Tell her about your family when you were little, and about a relative whom you loved and has since passed on. Has your child experienced loss yet? If so, this might be a good time to talk about it. If you like, leave a flower or other token on their grave before you go.

      (Click HERE for image source)
      If you don’t have family nearby, do your best to visit the oldest graveyard in your area. Look at the markers and headstones and try to discover something about the people there. Talk about how the world was different when they were alive and what their lives may have been like when they were little.

      If it’s a nice day, take a picnic with you. Enjoy your meal in a beautiful, peaceful spot.

      Graveyards are quiet places that allow us to see life from a different perspective. While you’re there, take a few minutes to sit and think about the things you want to accomplish in your life. How do you want to be remembered when you’re gone?

      Activity- find the following:
      • A bench
      • Someone who was over 75 years old
      • Someone who was less than 5 years old
      • Someone born before 1900
      • A famous person
      • A picture or statue of an angel
      • A very old tree
      • Someone with the same first name
      • Someone you’re related to (if possible)
      • A poem

      When you get home, try a few activities that focus on your family’s history.

      Go through your family photos. Talk about each person in your family with your child and try to learn something new about them. Talk about where your ancestors lived and what things they would have done when they were younger.

      If you have old family records or journals, read a few excerpts or act out a story you find.

      Create a family tree. You can do this in so many fun, crafty ways. To make the standard version, write your child’s name on the left side of your paper; to the right make a sideways V with the open side facing away from the name. Now write the parents’ names, one at each point of the V. Continue to write names until you’re stumped.

      If you have a lot of pictures of family members, try making a family collage in the general shape of a tree. Or just put them together in a book from the youngest to the oldest, grouped by families.

      (Click HERE for image source)


      If you live close enough to your relatives, try a thumbprint tree. It’s so cute to see everyone’s green thumbprints look like leaves at the ends of the branches. Click THIS link for a template.

      If you’re interested in finding more names for your family tree, you can download FREE Personal
      Ancestry File (PAF) software at THIS LINK. They also have a ton of ideas for finding more family names.
      Recommended Reading:

      • The Kids’ Family Tree Book, Caroline Leavitt
      • Fancy Nancy: My Family History, Jane O’Connor
      • Me and My Family Tree, Joan Sweeney
      • Evie Finds Her Family Tree, Ashley B. Ransburg 

      Monday, October 24, 2011

      Outdoor Adventures: Pumpkins by Erin Uda

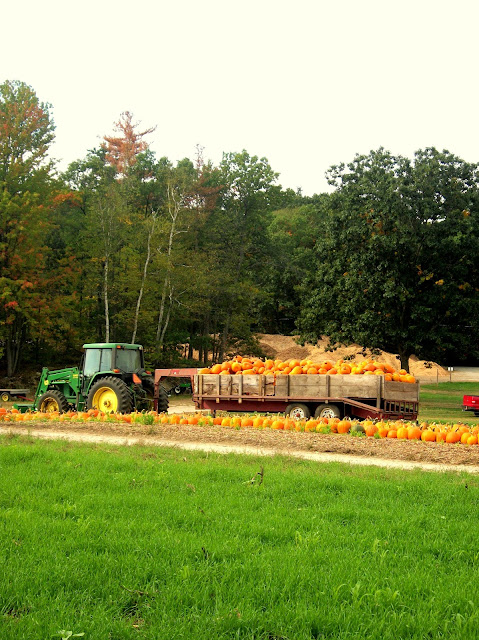
      This week, try to visit a pumpkin patch with your children to see where the bright orange gourd is grown. Look at all the varieties; shapes, sizes, colors. Pick your own if you can and take it home to decorate.


      Did you know pumpkins are related to cucumbers? On your way to the pumpkin patch, you might want to play a quiz game using some little-known facts about pumpkins. Print out the following facts:
      • What kind of vegetable is a pumpkin? Trick question. A pumpkin is a fruit; specifically, a squash.
      • How many continents do pumpkins grow on? Pumpkins grow on 6 out of 7 continents, even in Alaska!
      • What is the (self-proclaimed) pumpkin capital of the world? Morton, IL (This is also the corporate base of Libby’s Pumpkin.)
      • Who was the first person to carve a pumpkin? The Irish. They originally carved turnips for All Hallow’s Eve, but when Irish immigrants found pumpkins they liked carving them better.
      • Is the orange part of the pumpkin the only part you can eat? No. Pumpkin flowers are also edible.
      • How big can you make a pumpkin pie? The biggest pumpkin pie ever made was over 5 feet wide!
      • How much water is in a pumpkin? Pumpkins are 90% water; watermelons are 92%.
      • Are pumpkins healthy for you? Yes, before we add sugar! Pumpkins have Vitamin A and potassium, plus fiber.
      • What is the most famous pumpkin vehicle? Cinderella’s chariot.
      • How much did the biggest pumpkin weigh? The heaviest pumpkin weighed 1,140 pounds
      Or you can study The parts of a pumpkin together!


      There are many other fun fall activities, like hay rides, farm visits, and corn mazes. If you don’t plan to visit one of these venues, try making your own this week:

      Corn Maze: Make your own maze in your backyard. Bring some kitchen chairs outside and arrange them in a winding pattern; backs facing backs to form a path. Cover them with blankets (either over just the chair, or over the top as well) and you have a simple maze.

      Hay Ride: Break out the wagon and take your little ones on a tour of the neighborhood. Keep an eye out for fun porch decorations and decide which houses you think will be the most fun to visit next week. Better yet, let them wear their costumes on the ride.


      Petting Zoo: All these farm activities make me feel the need to find a petting zoo. If there isn’t one close to where you live, try to find an inexpensive alternative. There may be a horse pasture relatively close, or a pet store or breeder who wouldn’t mind having you visit the animals.


      Recommended Reading:
      • It’s the Great Pumpkin Charlie Brown!, Charles M Schultz
      • Pumpkin Jack, Will Hubbell
      • Too Many Pumpkins, Linda White
      • The Runaway Pumpkin, Kevin Lewis
      • Big Pumpkin, Erica Silverman
      • The Night Before Halloween, Natasha Wing

      P.S. A side note from Naomi: I just added a new tab at the top-left of the page called "Calendar". If you go to it, you will be able to see all the themes and activities I am planning for each week. Click on an activity and get some ideas of how to do it yourself. If you click on today's date there will be several links for fun pumpkin carving ideas. Enjoy!

      -Naomi

      Tuesday, October 18, 2011

      Outdoor Adventures: Leaves by Erin Uda (and a quick update)

      Erin has another wonderful outdoor post to share with you today, but first a quick update on the Phineas and Ferb Challenge: You saw most of what we did during the week on my last post, but there were several things we did where we didn't bring the camera. Those things included leaf fights and frolicking, long walks, reading under the blankets together, enjoying yummy treats, playing with friends, and having wild dance parties in the living room. It was a fun week and a great opportunity to be reminded how to have unplanned fun. I hope you all had a successful week as well! (Oh yeah! and I forgot to mention, this week we will be focusing on Fall themed activities. Feel free to join along and share your ideas.)

      -Naomi 

      This week’s post is super simple:

      Rake…

      Jump…

      Repeat!

      If the leaves aren’t quite ready to be jumped in yet, here are some other leaf-related ideas:

      1. Look at the different colors on the trees as you drive around your neighborhood or a scenic loop. Talk about which tree you like best and why the leaves change color every year.
      2. Pick some fall leaves on a nature walk. Dip them in wax, if desired, to keep the color, or press them between the pages of a heavy book; frame your favorites in shadow boxes.
      3. Make a Book of Leaves: Pick one leaf from each different type of tree you see (maple, oak, etc). When you get home, find pictures of the full tree online and print them out. Mount each leaf to a piece of paper, and create a book showing your leaves and the trees they come from.
      4. Create shapes and animals using the leaves you find. (See Leaf Man for some inspiration, or check out THIS website.)


      Recommended Books:

      • Leaf Man, Lois Ehlert
      • Red Leaf, Yellow Leaf, Lois Ehlert
      • We’re Going on a Leaf Hunt, Steve Metzger
      • Leaves! Leaves! Leaves!, Nancy Elizabeth Wallace
      • Leaf Man, Lois Ehlert
      • Leaves, David Ezra Stein

      Monday, October 10, 2011

      Outdoor Adventures: Climbing by Erin Uda

      Kids have an innate need to climb everything they see. This week, instead of going to a man-made playground, discover the natural playground around you.

      Find a good climbing tree or tangle of rocks and get out with your children, showing them your technique. Start with small rocks and trees and gradually work into the larger, taller, more difficult ones. You want your child to get comfortable with heights and learn to master the feeling of unsteadiness that comes when you don’t have two feet flat on the ground.


      If you don’t have trees and rocks readily available near your home, try going to a local park or a public school playground if you’re looking for trees. If you’re looking for rocks, search your city parks online and look for some natural rocks, retaining walls, or climbing areas. Or just look around as you’re driving. You’ll see them everywhere once you start looking.

      If you can’t find a suitable outdoor climbing area, consider going to a climbing gym. I took my boys indoor climbing for the first time last month and after a few tentative attempts, they got really into it. Of course, the older one acclimated much faster and went off on his own after just a few climbs. I ended up climbing side-by-side with my youngest the entire time, but it was still a huge boost to his self-confidence to keep trying and finally get near the top.

      Remember to tailor the difficulty level to the skill set of your child; don’t force him to do something he’s not ready for. But don’t let him chicken out either. You’ll both miss out on something special.

      If the weather cooperates, you can turn your climbing adventure into a fun photo shoot. Just dress the kids in bright, warm clothes and snap pictures as they climb around.

      And don’t be afraid to bring souvenirs home. Rocks are one of the most collected items. If you can, visit a rock quarry or natural history museum to get up close and personal with some of the more exotic and colorful types of rocks.

      You could also FIND a geode, or thunder egg, GROW one, or ORDER some online.

      There are plenty of stores, museums included, that sell semi-precious rocks; let your children pick out a few that interest them, then spend the afternoon researching more about them. What is it called? What is it made of? How is it made? Where are they found?


      And when you’re all finished, try MAKING some rock candy.

      Suggested Reading:

      • If you Find a Rock, Peggy Christian
      • The dragon in the sock drawer, Kate Klimo
      • The Waterfall, Jonathan London
      • Geodes: Nature’s Treasures, Brad L. Cross & June Culp Zeitner
      • Rocks: Hard, Soft, Smoth, and Rough, Natalie M. Rossinsky
      • The Rock Factory: The Story About the Rock Cycle, Jacqui Bailey
      • Everybody Needs a Rock, Byrd Baylor
      • A Tree is Nice, Janice May Udry

      Monday, October 3, 2011

      Outdoor Adventures: Urban Hike by Erin Uda


      Hikes typically involve exploring nature, both on the trail and at the destination; but since few of us live far enough from the city to be able to hike near our homes, we’re changing things up a bit and taking an urban hike. On this kind of hike, you’ll be exploring your city, along with the people and places it holds.

      Urban hikes follow the same steps as traditional hikes; namely, choose your destination and path, prepare your clothing and gear (walking shoes and weather-appropriate attire), and practice safety (be sure to stay in a part of your city you know to be safe).


      Big cities are fun to walk in because everything is compact. If you live in Suburbia, like me, you are forced to drive almost everywhere due to the long distances involved. This week try to find a spot, either close to home or somewhere you can drive to, where you can walk around and explore city-style.


      I recommend choosing somewhere that is familiar to you and your child, like your favorite ice cream shop, as a home base. Park your car, grab an ice cream cone and start walking. Remember to create a loop. Cross the street for the return trip and find some new scenery. Remember that what takes minutes in the car can take hours on foot, so plan on covering only a short distance unless you have a lot of time.

      Take it SLOW…

      What do you see on the way there (and back) that you haven’t noticed all the times you’ve driven? Talk about the importance of going slow sometimes so we can enjoy all the things around us.

      Stop to smell the roses, or in this case, bakeries. Don’t be afraid to visit some of the shops or restaurants you pass. That’s part of the fun. Grab a cupcake from the bakery, find a book at the library, or window shop at the toy store.


      When you get home, have your child tell you about her favorite parts of the walk. Write a short story together about all the places you found then let her illustrate it.

      Recommended Books:
      • I Went Walking, Sue Williams
      • Didi and Daddy on the promenade, Marilyn Singer
      • City (Eyewitness Books Series), Philip Steele

      Monday, September 19, 2011

      Outdoor Adventures: Halloween Fairy Tale Carnival by Erin Uda

      (Click HERE for image source)
      Ok, so I know this is early and not so much outdoors- as it is holiday-inspired, but since the kids will be outside to trick-or-treat, (and since you will need sufficient time to prepare for such a big event) I thought I’d stretch it a bit this week. If you want to get outside, you could hold this at a park or pavilion. Just be sure to have a weather back-up plan.

      I’ve never been a big fan of the scary aspect of Halloween, and I don’t know many kids who like to be terrified, so for this year’s party I’ve come up with a slightly-spooky theme that I think is entertaining as well as appropriate for young kids. Fairy tales are naturally a bit dark and spooky, especially since so many of them are set in a dense, shadowy forest. Add to that all the witches, wolves, beasts and magic and you’ve got a recipe for adventure. Hope you have fun!

      Stations

      There are so many fairy tales out there that the amount of activities available is endless. Choose a few from the list below, or use your favorite fairy tale as inspiration for a new station. If you’re having a bit of brain-block, post a comment with your favorite fairy tale and I’ll see what I can come up with.

      (Click HERE for image source)
      Rapunzel’s Rope Climb Tower
      • Hang a rope from the ceiling. You can use a specialized rock climbing rope, a sturdy jump rope, or whatever else you have handy. If you’re using a gym, consider hanging the rope from the basketball hoop supports; if you’re doing this at a park, try the cross-beams of the pavilion. Remember to have some sort of cushioning underneath for falls (pillows or old mattresses work well for this). 
      • Decorate the wall or surrounding area with a fake stone tower. There are some great stone wall decorations available at party supply stores.  
      • The object of this station is to have the kids try to climb to the top of the rope. If you have both older and younger kids, try setting up two stations; one with the regular rope with a couple of knots tied into it for traction and another in conjunction with a slide or other slanted surface to help the little ones climb. 
      • Give plastic gold coins to those who participate. 
      • Attendant: The Witch, Rapunzel, or the Prince
      Jack’s Beanstalk Relay
      • This is based on the same activity as Rapunzel’s tower, only a little more involved. Create an obstacle course with the following actions: Climb up a slide using a rope to help, then down the stairs, through some obstacles, pick up a ‘golden goose’ and take it back to the beginning. 
      • Try to keep the actions related to the Jack and the Beanstalk fairy tale. The obstacles could be giant versions of things, like a huge stone step they have to climb (made out of a table covered with a brown or grey cloth), or hula hoops spread out as stepping stones or clouds they have to jump on. 
      • Give plastic gold coins to those who participate. 
      • Attendant: Jack or Jack’s mother
      (Click HERE for image source)
      Little Red Riding Hood / Grandma’s Cottage
      • Create a cottage. Decorate the inside with Grandma’s bed, hang Red’s cape on the wall. Set up a few tables in the cottage.
      • Fight the wolf in a battle of wits as he sits in the bed. Or set up a few chess sets for the older children to play; they can play against each other or ‘the Wolf’ you have stationed there. If you don’t want to use the bed, include a few riddle stations, where the wolf poses easy riddles to those who visit the cottage. If you’re not feeling good about either of these, turn this station into an arm-wrestling booth. 
      • Give plastic gold coins to those who participate. 
      • Attendant: the Wolf or Granny
      Hansel and Gretel
      • Create a forest trail running around (or meandering through) the entire perimeter of your park or facility. The trail can be created by strewing leaves (real or fake), mulch, rocks, or even carpet tiles or garden stones. 
      • The trail should lead to a witch’s cottage. For better Hansel and Gretel effect, leave bread crumbs along the path. 
      • Set up a candy buffet in the center of this station. You could decorate with ovens and gingerbread men, etc. The children trade their coins in for a small box or bag that they can fill with candy. Try small plastic bags that close with a twist-tie or paper take-out boxes for portion control. 
      • Fortune-telling by the Fates. Have a couple of witches give fortunes while the children are waiting for their turn to get candy. Remember the fake eyeball! 
      • Attendant: Witches
      (Click HERE for image source)
      Snow White and the Seven Dwarves’ Cottage
      • Set up a cauldron and go bobbing for poisoned apples.
      • Set up a wishing well. To make it easier to fish for prizes (gold coins or small wrapped candies) put the well on a high table so the person attaching the candy can sit underneath. You could also try using a weak magnet and paper clips. 
      • This is a great place to add other traditional Halloween games.
      • Give plastic gold coins to those who participate. 
      • Attendant: Snow White or any of the Dwarves.
      The Black Forest / The 12 Dancing Princesses
      • Create a dance floor decorated with forest trees, disco balls, spider webbing hanging from the ceiling, and other spooky touches. 
      • Plug your iPod into a large speaker and play some fun music for the kids to dance to. Playlists could include songs from fairy tale-inspired movies, Kids Bop, or your own personal favorites. 
      • On one side of the dance floor, set up a stool or small table. Stand the children on it (make sure it’s steady) and take pictures of the child’s shoes. Try to get a shot that includes her face while focusing on the shoes; she may want to take them off and hold them for the photo. Decorate the table with old ballerina slippers (found at good will) and other types of dance shoes. You can let the child make a craft using the photo (decorate a photo frame) or send it home later as a souvenir/thank you card. 
      • If you’re brave, you could have a real dance company put on a short performance. 
      • Attendant: The Dancing Princesses (or just parents)
      (Click HERE for image source)
      The Beast’s Castle
      • This watered-down version of a haunted house is where ordinary objects come alive and talk to you as you walk through the Beast’s castle. It shouldn’t be too scary for the little ones, but just surprising enough to make them jump. 
      • Give plastic gold coins to those who participate. 
      • Attendant: Beauty or the Beast
      The Princess and the Pea
      • Set up a pile of sleeping bags, a small foam mattress, or yoga pad and put marbles underneath. Have the children lie on the bed and guess how many marbles they’re laying on. 
      • You can also have a jar full of dried peas displayed. Let the children guess how many peas are in the jar. 
      • Did someone say Edamame eating contest?? 
      • Give plastic gold coins to those who participate. 
      • Attendant: the Princess or the Queen
      (Click HERE for image source)
      Goldilocks and the Three Bears
      • For the youngest children, play a game with the sizes small, medium, and large. Place sets of small, medium and large items in this area; point to the different items in the room and ask what size they are. Try decorating with the items mentioned in the book: bowls, chairs and beds (or pictures of beds, anyway).
      • Play the cups game where you mix up three cups and they guess which one the gold coin is under. When they get it wrong, say “Too hot!” or “Too cold!” If they get it right, they keep the coin.
      • Play the hot/cold game to find hidden coins in this area. When they’re going away from the coins, say “You’re getting colder!” and when they get close to a coin, say “You’re getting hotter!”
      • Give plastic gold coins to those who participate.
      • Attendant: Goldilocks or the Bear Family (with all three bears)
      Three Little Pigs
      • Let the child be the wolf and try to knock down three different piles of items: straw, sticks, and bricks. Set up the straw in a tee-pee shape, the sticks in stacked bundles, and the bricks like dominoes so they’re easy to knock down. Use a baseball or other weighted item.
      • Give each child a straw and ask them to blow a small bouncy ball (or other item) to the end of a long table. Have a line down the middle of the table length-wise and set up races, one child on each side. Bumpers on the edges and in the middle would definitely make this more child-friendly.
      • Give plastic gold coins to those who participate.
      • Attendant: the Wolf or a Pig
      (Click HERE for image source)
      Little Mermaid
      • Decorate this station with netting and a Hawaiian or sea theme.
      • If you don’t use the wishing well from Snow White's Cottage, set up the fishing game here.
      • Set up a small kiddie pool and fill it with ducks, some of which have a number or shape marked on the bottom. Let the children choose a duck to see if they earned a coin. If you can, find floating objects that relate to the fairy tale such as fish, mermaids, or crabs.
      • Hold a ‘Sea-legged’ (three-legged) race to get their land-legs functioning again
      • Hang a sturdy net and have the children climb it; or use an existing playground installation
      • Give plastic gold coins to those who participate.
      • Attendant: Mermaid
      The Frog Prince
      • Set up a photo station using this fairy tale as the theme. Use a wooden cut-out of a prince / princess and a frog and set them up for parents to take photos. If this is too difficult to find, use cardboard cutouts of fairy tale characters or other Halloween standards like mummies or Frankenstein. 
      • You could also have a large plastic frog the girls can kiss, since most of them will likely be in princess attire. 
      • Attendant: Prince (designated photographer, optional)
      (Click HERE for image source)
      Cinderella’s Slipper Store
      • This station is costume central. Kids can add to their costume with face painting or accessories (spread out trunks full of dress-up items), get their photo taken for the costume contest / party scrapbook, and vote for their favorite costume.
      • Hang each child’s picture up on the wall with a number on it using string and clothes pins. Set up a table below the display with crayons, scraps of paper, and a large cauldron where people can put their votes.
      • Consider having a few wacky mirrors here for the kids to look at themselves in.
      Rumplestiltzkin’s Bargain Basement
      • This is the food station, where children use the coins they have collected to purchase drinks, food, and other trinkets/items.
      • Decorate with straw or hay bales, spinners (you could use modified wagon wheels or even upside-down bikes if none are available) and baskets of gold coins. When the children pay, have them throw their coins over the counter into the baskets.
      • Use apple juice/cider if you want it to look like butter-beer, cranberry juice if you want it to look like blood, and homemade root beer if you want it to look like a potion. Or go with something simple and have boxed juices.
      • Red’s baked goods display, with baskets of cookies and treats, including miniature caramel apples.
      • Attendant: Rumpelstiltskin, the Miller’s Daughter, or Red Riding Hood
      Pumpkin Patch
      • This is the arts and crafts area. Set up some tables and chairs and let the creativity flow.
      • Decorate pumpkins using paints, pins, etc. Try some of these nifty ideas I found on Pinterest or come up with a few of your own:
      Pumpkin in lace tights
      Bat Pumpkin
      Dracula teeth pumpkin
      Paper pumpkins
      • Print out a stack of fun internet coloring sheets, set them on a kid-sized table along with a bunch of crayons in fun containers and Voila! You have a coloring station. If you decide to use a candy bag as your invitation (see below) set up a table where the children can decorate their bag. You can find inexpensive canvas or paper bags anywhere. Or use a brown paper lunch sack and THIS craft idea from Family Fun.
      Tips and Tricks
      • Use 10x10 or larger canvas pop-up coverings for each cottage/station. They’re easy to manage, don’t take up much room, and allow the activity to spill out the sides a bit. 
      • Line your entry or Hansel and Gretel trail with glowing jars made by emptying out a glow stick into a mason jar and shaking it. You can usually find glow-sticks at the dollar store. 
      • Send separate invitations to the parents and the kids. Ask the parents to help with the stations; let them choose from the attendant costume list. 
      • If you’re holding a costume contest, be sure to include the categories and rules with your invitation; deliver them early, especially if you want your guests to come in fairy tale costumes. 
      • You can use lots of things besides a standard letter as the invitation. To make your invite memorable, try printing the party info on a candy bag they can bring and decorate, a photo card with the image of a spooky forest or your family in costume, or make a small candy house with the info printed on the base. If you sent your invitation early, you may want to send out a reminder a week before; include a couple of gold coins in this for the guests to spend as soon as they arrive.